Updated June 02, 2022
A Michigan tax power of attorney (Form 151), otherwise known as the “authorized representative declaration,” is used to appoint someone, usually a tax attorney or certified public accountant, to represent another person at the Michigan Department of Treasury. During such a time this document will be instrumental in making sure that all such agents (i.e. tax preparer) wield the authority to access your tax information and make filings on your behalf with your approval.
How to Write
1 – Gather The Reference Documents Then Open The Declaration Form
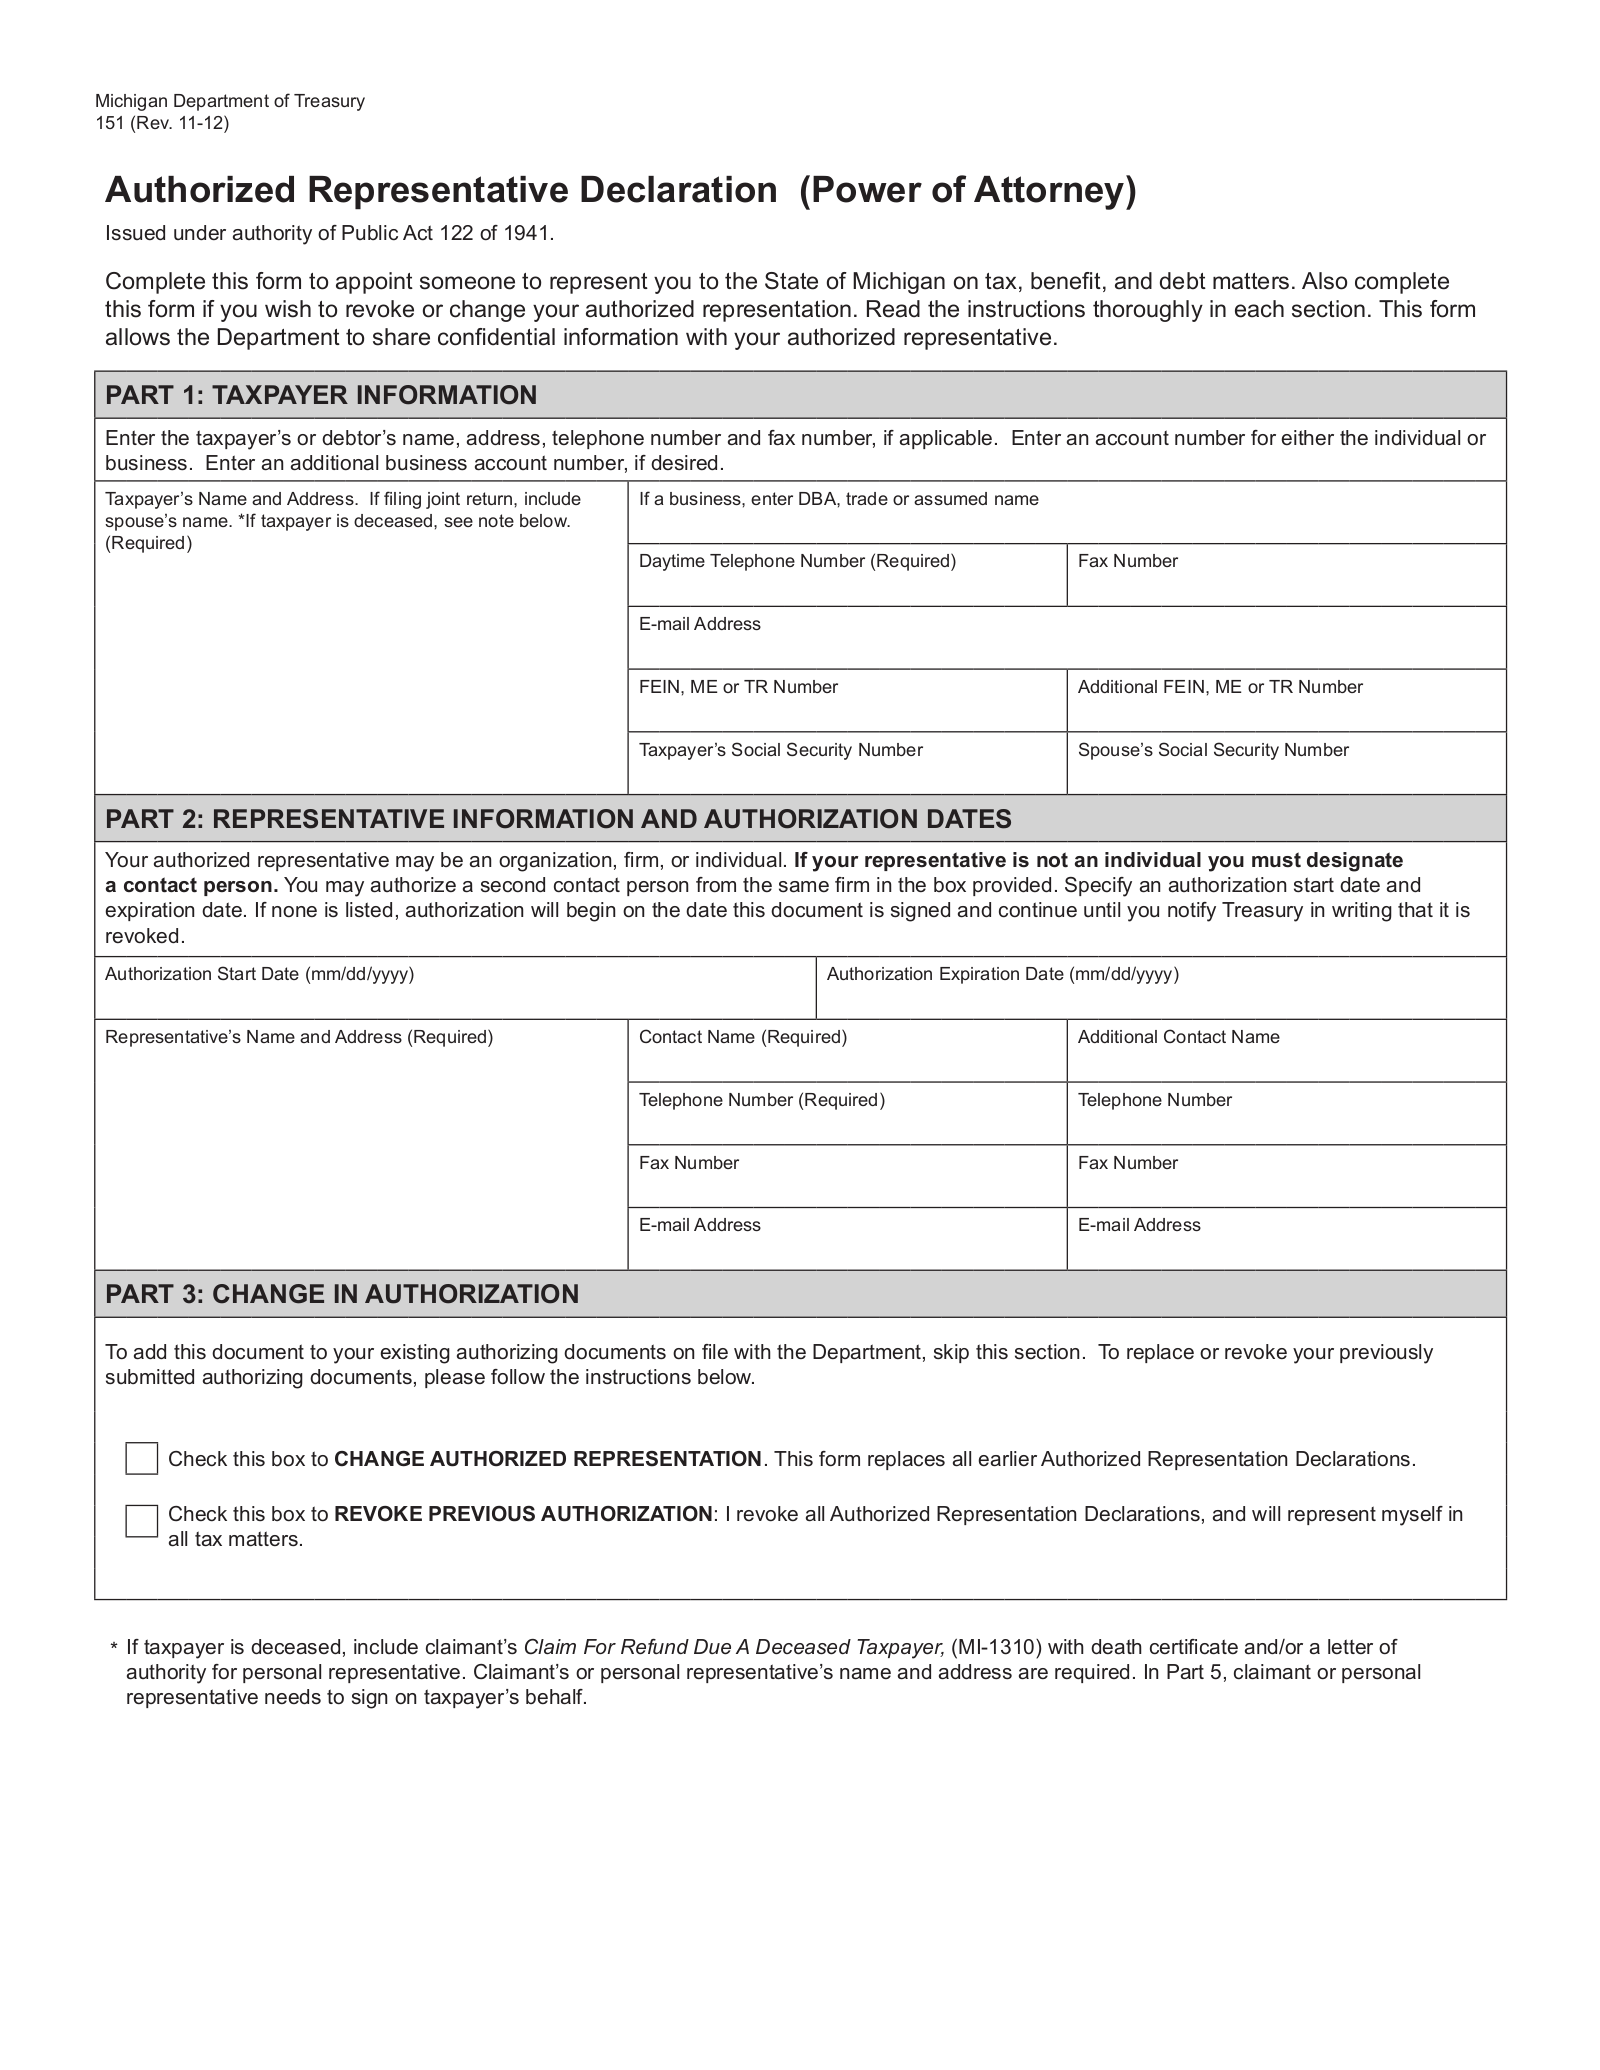
Open and download a workable copy of the required Declaration Form to designate and Authorized Representative. This form is available as a PDF, ODT, or Word document as indicated by the buttons by the preview image.
2 – Document The Principal Taxpayer’s Identity and Contact Information
Once you have opened the form with the appropriate software or printed it, you may begin entering the information it requires. Locate the table in “Part 1: Taxpayer Information.” In the first box, below the term “Taxpayer’s Name and Address…,” enter the Full Name and Complete Address of the Declarant or Principal Taxpayer. If the Taxpayer has filed jointly with a Spouse, the Spouse’s Name and Address must be recorded here.  The box labeled “If A Business, Enter DBA, Trade Or Assumed Name” is conditional. That is if the Principal Taxpayer is not a business entity it may be left blank. If so, then enter the Legal Name (including any applicable suffix) of the Principal Taxpayer Business in this box.
The next row in this area will require the “Daytime Telephone Number” and provide an option to report the “Fax Number” where the Principal Taxpayer is reliably reached. Make sure the Phone Number(s) entered here are well-maintained by the Principal.  Next, enter the Principal Taxpayer’s official “E-Mail Address.”
 The fourth and fifth rows in this area are devoted to the Principal Taxpayer’s Identification Number.
If the Principal Taxpayer (appointing a Representative) is a Business Entity, then record its “FEIN, ME, or TR Number” in the first box of the fourth row. If the Principal Taxpaying Entity is known by two Identification Numbers (i.e. FEIN and ME), the second number may be entered in the “Additional FEIN, ME, or TR Number” box.  If the Principal Taxpayer (appointing a Representative here) is a person, then enter this individual’s Social Security Number in the box labeled “Taxpayer’s Social Security Number.” If the Principal Taxpayer filed jointly with a Spouse, then enter his or her “Spouse’s Social Security Number” in the next box.
3 – Provide The Effective Dates Of Representation And The Appointed Representative’s Information
By default, the Representative’s Principal Powers will be available to the Representative Agents upon the Principal’s Signature and remain in effect until the Principal issues a written revocation. However, if the Principal Taxpayer has definitive Dates when the Agent’s Principal Power should go into and out of Effect, he or she may apply this determination in the first are of the next section “Part 2: Representative And Authorization Dates.”
To declare a Start Date to the Representative Agent’s Principal Powers, enter it in the box labeled “Authorization Start Date,” as noted, enter this Date in the MM/DD/YYYY format. Then, if a Termination date has been determined (by the Principal Taxpayer), enter it in the box labeled “Authorization Expiration Date” (also, in the MM/DD/YYYY format). 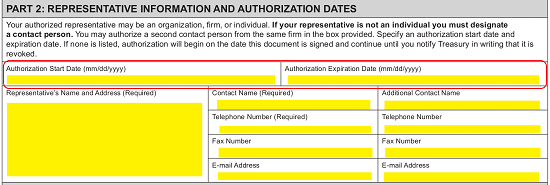 The next row in this section is required information as this will document who the Representative receiving Principal Taxpayer Powers is. Begin by entering the Full Name and Address of the Appointee in the box labeled “Representative’s Name And Address.”
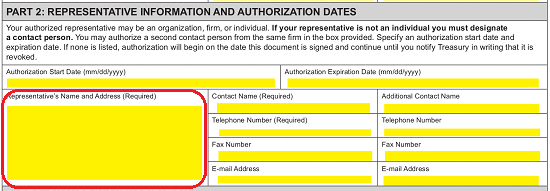 If this is a Business Entity, then enter the Full Name of an individual who can receive correspondence on the Business’s behalf (pertaining to these Tax Matters) in the box labeled “Contact Name.” If there are two individuals who may engage in correspondence on behalf of this entity, then enter the second individual’s Name in the space designated as “Additional Contact Name.” Note: If the Representative is an individual, re-enter his or her Name in the box labeled “Contact Name.”
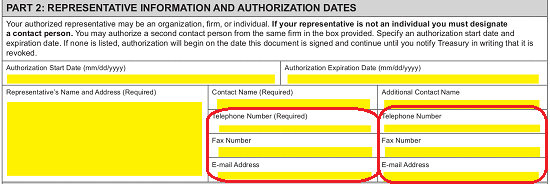
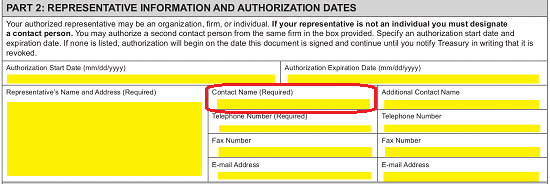 Next, enter each Representative Contact’s “Telephone Number,” “Fax Number,” and “E-Mail Address” using the column below the corresponding Contact’s reported Name.
4 – Define How Previous Authority Documents Stand After This One’s Execution
The successful Execution and Submission of this delegation form will not necessarily affect other Authority documents. However, if the purpose of this form is to change and Authorized Representative or to Revoke (and possibly replace) a pre-existing document altogether, this may be indicated in “Part 3: Change In Authorization.”
If this document is meant to Change the Representative on a Tax Matter named here, then mark the first box, labeled “Check This Box To Change Authorized Representation…”  If the purpose of this form is to Revoke previous Authorities, then mark the box labeled “Check This Box To Revoke Previous Authorization”
5 – Specify The Type Of Principal Taxpayer Authorization Being Granted
In “Part 4: Type Of Authorization,” we will specify the extent of the Principal Authority being granted to the Representative. Here two choices will be presented (Choice A and Choice B). Enter mark one of these boxes to indicate how much Principal Authority is being appointed to the Representative.
If the Principal Taxpayer only wants to grant a Limited Authority, then mark the box between the bold letter “A” and the words “Limited Authorization.” If this box is marked, the Principal will need to initial the blank space just before the words “Initial.” 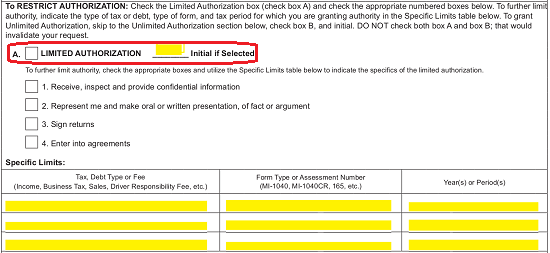
 In order to designate a Limited Authority, it will be necessary to indicate what the Limited Authority affects. A list of four checkboxes has been provided to this end. The first will grant the Representative the Principal Power to Receive and Provide Confidential Information on behalf of the Principal Taxpayer, the second will grant the Agent the right to represent the Principal, the third will give the Representative the right to Sign the Principal’s Returns, while marking the fourth check box empowers the Representative to enter the Principal into Agreements. Place a Mark in the check boxes corresponding to actions the Representative may take in the Name of the Principal.
 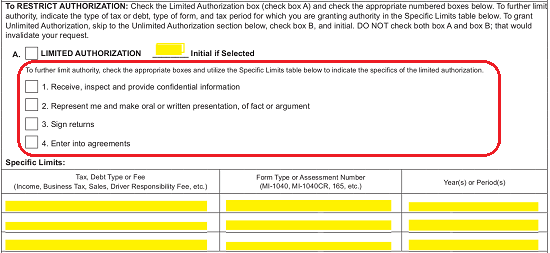 In addition to the list of Limited Powers, the Representative’s Principal Authority may be further defined in the “Specific Limits” table. Here, there will three columns where you may report the “Tax, Debt Type or Fee” the appointed Agent may utilize Principal Authority within the first column, its corresponding “Form Type or Assessment Number” in the second column, and the “Year(s) of Period(s)” that apply to that Matter where the Representative’s Principal Authority is effective in the third column. You may report on three Tax Matters using this table however if the Limited Powers will apply to more, you may document this in an attachment that is properly labeled.
 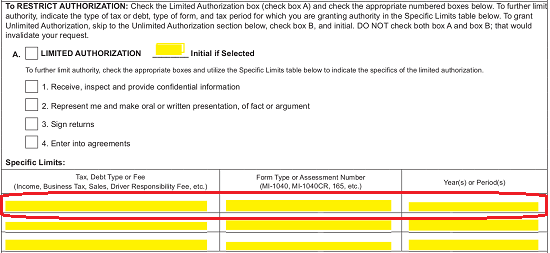 If the Principal Taxpayer is granting Unlimited Authorization to empower the Representative with the maximum amount of Principal Authority allowed by law, then mark the checkbox after the bold letter “B.” The Principal Taxpayer will also need to initial this choice in the space provided.

6 – The Principal Taxpayer’s Required Signature
The final table, in “Part 5: Taxpayer’s Signature” shall verify the Principal Taxpayer’s intent behind this submission. It will also verify that all the information is being presented with the full Authorization and Knowledge of the Signature Party.
The Principal Taxpayer must sign his or her name in the blank box labeled “Signature”  The Principal Taxpayer must also supply his or her printed Name and any Title he or she holds in the box labeled “Print Name and Title.”
 Finally, the Date of the Principal Taxpayer’s Signature must be entered (by the Principal Taxpayer) in the box labeled “Date.”
 The second row is reserved for the use of a Spouse who the Principal Taxpayer has filed jointly with. If this applies, the Principal Taxpayer’s Spouse must sign his or her Name, print his or her Name, and enter the Date of Signature in the first, second, and third columns.

