Updated August 03, 2023
A New York living will allows a declarant to write their medical treatment preferences in the event of incapacitation. The form is usually part of an advance directive that also allows a person to select a health care agent to make decisions on their behalf.
Laws
- Signing Requirements – Two (2) witnesses (PBH § 2981).
- Statute – § 400.21(b)(3)
How to Write
Download: PDF
Step 1 – Acquire The New York Living Will In The PDF Format
The New York Living Will can be downloaded as a “PDF” file by clicking on the button presented with the sample image. This section also presents a method to save the desired template through the link “PDF” above.
Step 2 – Introduce Yourself As The Issuing New York Principal
Review this paperwork once you have opened it. When you are ready to set your medical treatment preferences in writing, locate the blank line between the word “I” and the language “Being Of Sound Mind…” then produce your name on this line. Keep in mind, the name you enter here will be that of the Principal and must appear exactly as it is written on government-issued I.D. ![]()
Step 3 – Indicate If Or When You Wish Treatment Withheld
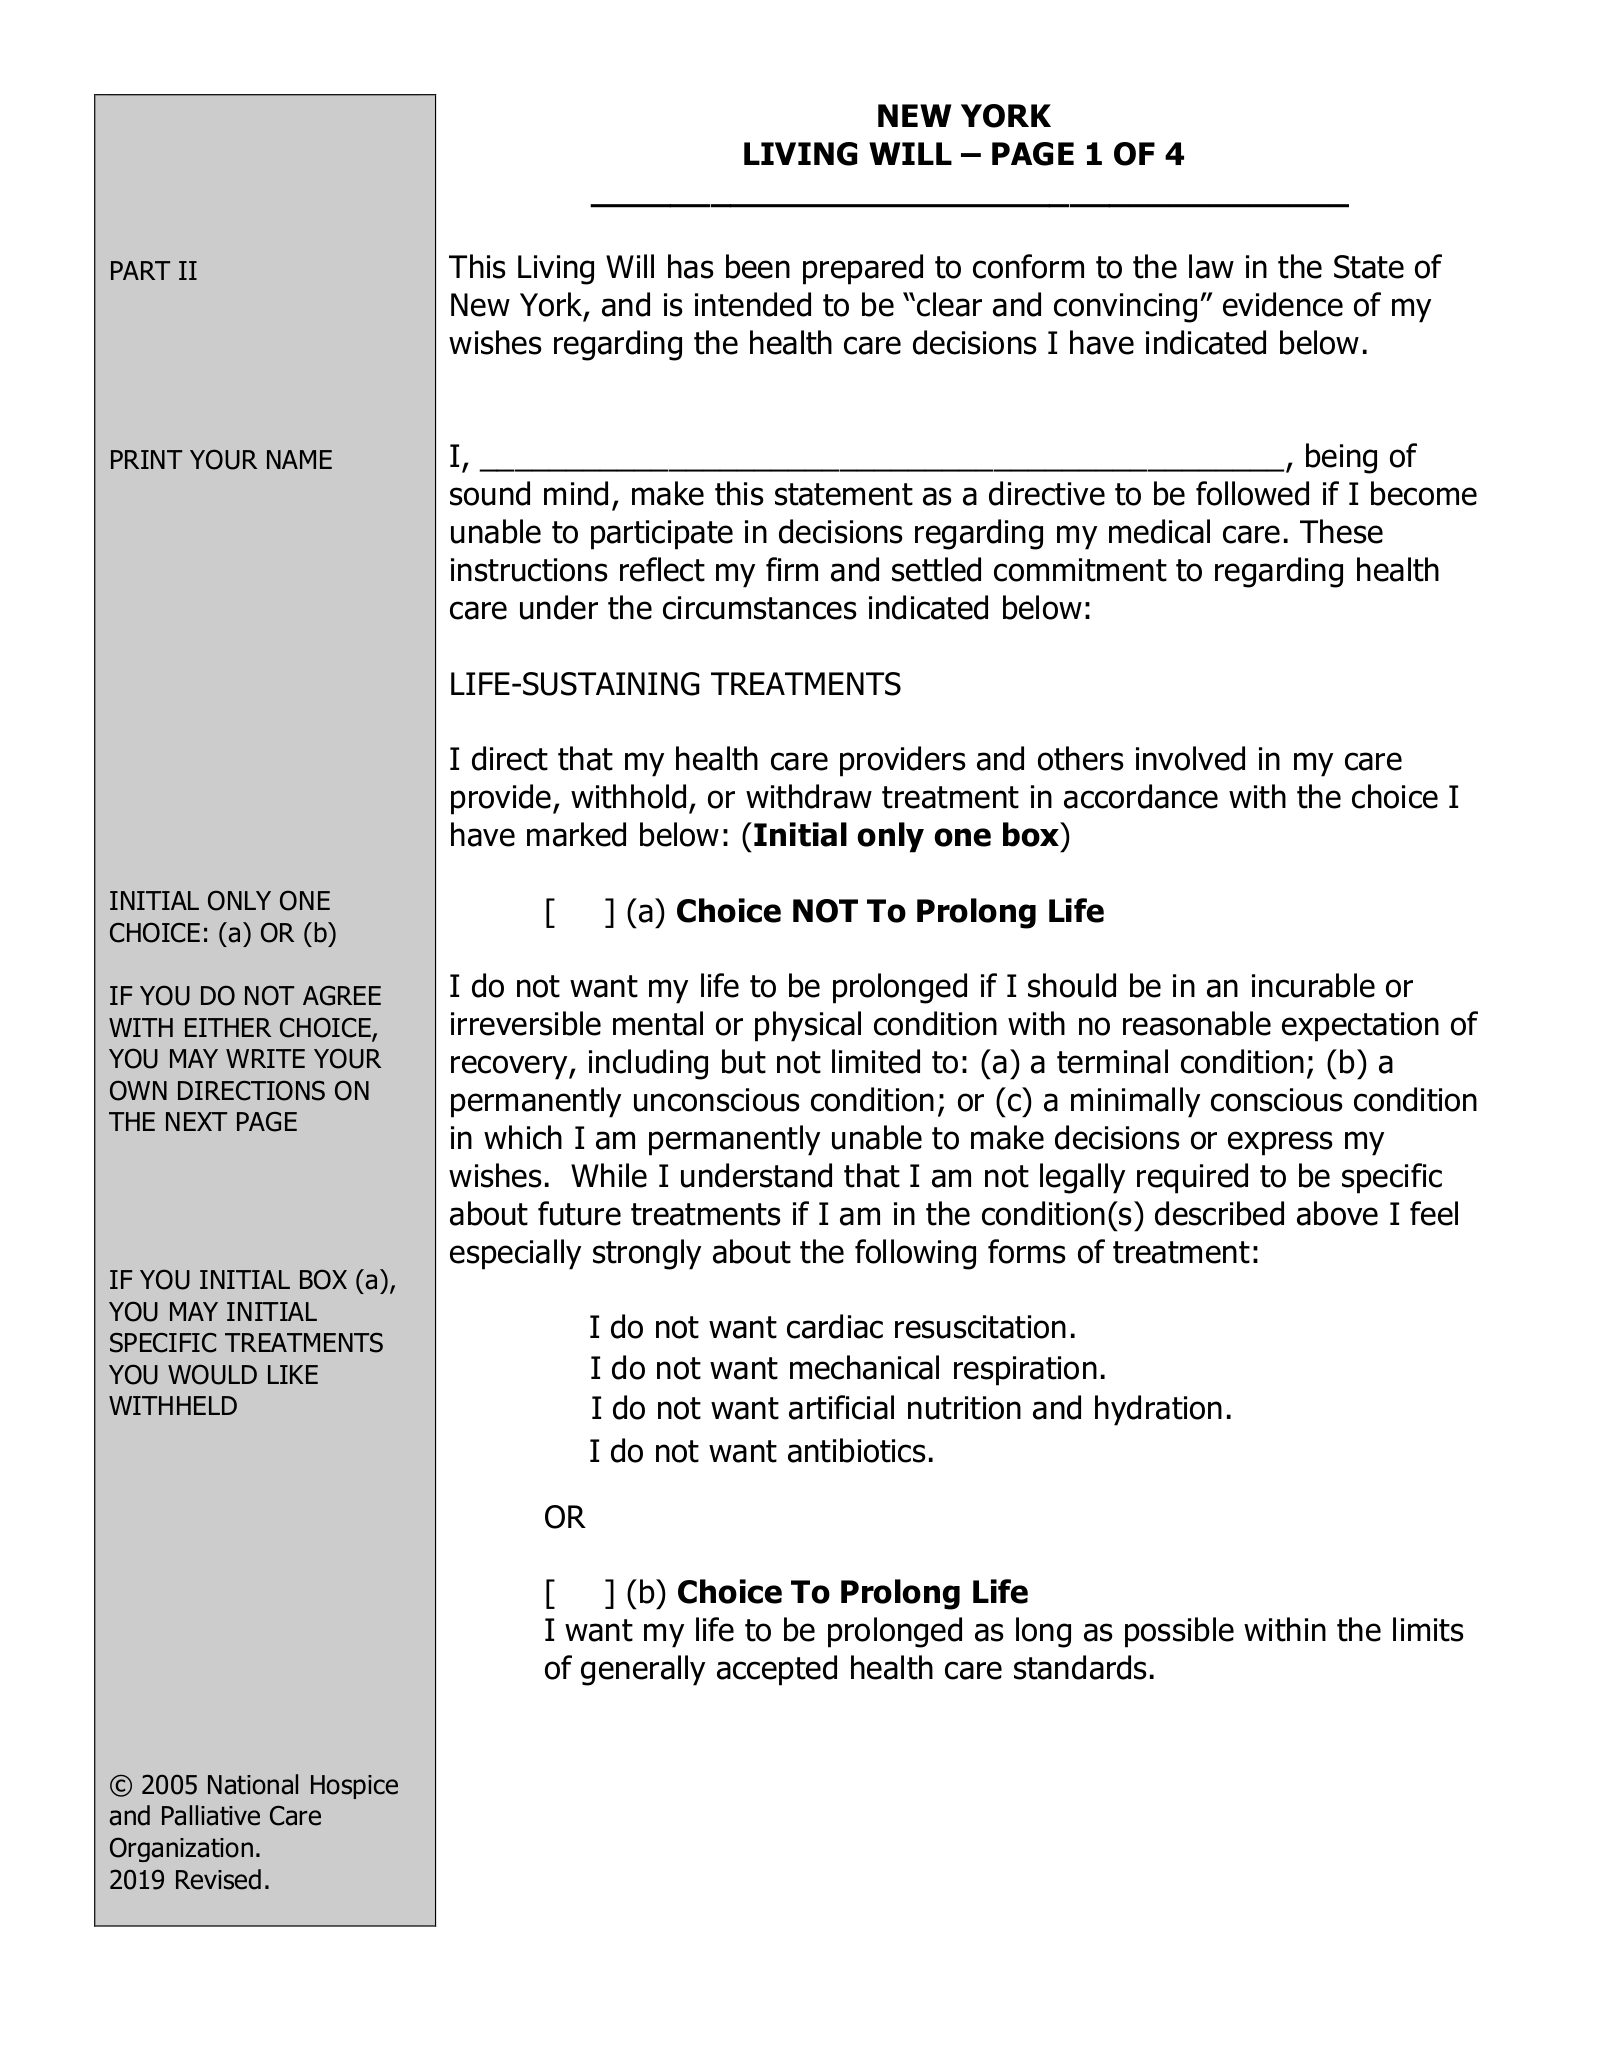
The choice to allow or not to allow life-prolonging treatments when you are unable to communicate because you are permanently unconscious (or semi-conscious), incoherent, or incognizant can be delivered through this document by initialing the proper statements in the “Life-Sustaining Treatments.” Begin with a review of the first option. If you choose not to allow life support procedures used when you have a terminal condition or when your ability to remain conscious (or coherent) has been severely handicapped and have nearly no hope of recovery then initial the brackets preceding “(A) Choice Not To Prolong Life.” Keep in mind this should remain unattended if you wish to receive treatment. In the example below, the Principal has decided that when struck down by a severe terminal medical condition that prevents consciousness or communication, treatment should not be administered to prolong life. Thus, the brackets mentioned earlier have been initialed. ![]() You may wish to verify what treatments you are strongly against. This task can be easily accomplished by tending to the list provided at the end of option A. For instance, if you do not wish New York Medical Staff to initiate CPR then, initial the statement “I Do Not Want Cardiac Resuscitation.”
You may wish to verify what treatments you are strongly against. This task can be easily accomplished by tending to the list provided at the end of option A. For instance, if you do not wish New York Medical Staff to initiate CPR then, initial the statement “I Do Not Want Cardiac Resuscitation.”![]() At times, New York Medical Staff may need to maintain your ability to breathe. If are against receiving “…Mechanical Respiration” then initial the second “I Do Not Want…” statement in this list.
At times, New York Medical Staff may need to maintain your ability to breathe. If are against receiving “…Mechanical Respiration” then initial the second “I Do Not Want…” statement in this list. ![]() If you are against receiving nutrients, liquids, and fluids artificially (i.e. with tubes or an IV) when unable to communicate and struck down by a medical condition then initial the third statement of this list (“I do Not Want Artificial Nutrition And Hydration”).
If you are against receiving nutrients, liquids, and fluids artificially (i.e. with tubes or an IV) when unable to communicate and struck down by a medical condition then initial the third statement of this list (“I do Not Want Artificial Nutrition And Hydration”). ![]() You may use this area to remove any authorization to treat your condition with antibiotics by initialing the final statement description (“I Do Not Want Antibiotics”).
You may use this area to remove any authorization to treat your condition with antibiotics by initialing the final statement description (“I Do Not Want Antibiotics”). ![]() If none of the above statements apply because you wish to receive life-sustaining treatment even when your consciousness or your ability to remain coherent has been permanently debilitated, then mark the item labeled “(B) Choice To Prolong Life.”
If none of the above statements apply because you wish to receive life-sustaining treatment even when your consciousness or your ability to remain coherent has been permanently debilitated, then mark the item labeled “(B) Choice To Prolong Life.” ![]()
Step 4 – Dispense Any Limitations Or Restrictions On Pain Management
In many cases, a terminal condition or one that threatens your life will be accompanied by a great deal of pain. Normally, New York Hospital and Medical Staff will seek to alleviate your suffering with pain medications and other pain management treatments. If you are against this and wish to place limitations, restrictions, or withdraw your consent from the alleviation of pain then you may use the section “Relief From Pain” to communicate this with the attending staff even when unconscious and unable to speak. This section provides several blank lines however you may insert more or name an attachment with your directives regarding pain management. If you do not wish to issue any such preferences, then you may leave this area unattended. 
Step 5 – Deliver Your Directives To New York Medical Staff
The section titled “Other Wishes” is an area where you may communicate additional instructions to the New York Physician or Medical Staff treating you. Here you may address specific medical conditions, scenarios, treatments, preferences, and restrictions. It is recommended that you take some time to consult with your Physician, a qualified professional (i.e. medical attorney), and/or any Health Care Agent you may set in place before supplying your directives here. If you do not wish to make further comments, you may leave these lines blank. ![]()
Step 6 – If Desired, Furnish Instructions Regarding Organ Donation
This issuance may be used to document your intent regarding anatomical gifts after death. To do so, locate the area titled “Optional Organ Donation.” If you do not wish to donate any of your organs, tissues, or body parts after death, then initial item “(A) I Do Not…” following the words “Upon My Death” ![]() If you do wish to make an organ, tissue, or other anatomical donation of any kind after death, then initial item “(B) I Give…”
If you do wish to make an organ, tissue, or other anatomical donation of any kind after death, then initial item “(B) I Give…” ![]() In a case where you wish to make only certain anatomical donations, this section will allow a direct entry of specific organs or body parts you wish donated. To produce this report, initial the brackets preceding “(C) I Give The Following…” then utilize the area directly below it to declare the nature of your post-death anatomical donation.
In a case where you wish to make only certain anatomical donations, this section will allow a direct entry of specific organs or body parts you wish donated. To produce this report, initial the brackets preceding “(C) I Give The Following…” then utilize the area directly below it to declare the nature of your post-death anatomical donation. ![]()
Step 7 – Declare Limitations Placed On Anatomical Gifts
If you wish to limit the purpose of anatomical gifts, then proceed to the next list (beginning with the word “Transplant” and ending with “Education”). Any item you initial from this list indicates that you forbid an anatomical donation for that purpose. For instance, if you do not wish to donate any organs or body parts for a “Transplant” then initial the brackets attached to the first item on this list. ![]() Initial the “Therapy” choice if you do not want an organ donation or other anatomical gift made for this purpose.
Initial the “Therapy” choice if you do not want an organ donation or other anatomical gift made for this purpose. ![]() If you do not approve of donating your organs, tissues, or body parts for “Research” then initial the third list item.
If you do not approve of donating your organs, tissues, or body parts for “Research” then initial the third list item. ![]() Initial the last item, “Education,” if you wish to restrict approval of anatomical gifts made to institutions such as medical schools or colleges.
Initial the last item, “Education,” if you wish to restrict approval of anatomical gifts made to institutions such as medical schools or colleges. ![]()
Step 8 – Execute Your Directive Before Two Witnesses
This document must contain proof that it is a true representation of your medical decisions. To this end, you must sign it before two Witnesses who are unrelated to you and do not stand to inherit any assets from your estate. Thus, review the above material you supplied, then sign your full name on the line labeled “Signed” in “Part III. Execution.” Once your signature has been executed, report the current calendar “Date” on the adjacent line.  Continue to the next line down, then print your name for clarification.
 ![]() Finally, supply your residential “Address” where requested. This should be your physical or geographic address so it must be composed of your home building number, street, and unit number of where you live along with the city, New York county, and zip code.
Finally, supply your residential “Address” where requested. This should be your physical or geographic address so it must be composed of your home building number, street, and unit number of where you live along with the city, New York county, and zip code. ![]()
Step 9 – Relinquish To The Verifying Witnesses
After completing the “Execution” section before two Witnesses, relinquish possession of this paperwork to these Parties. Witness 1 must read and agree to the statement beginning with “I Declare…” in order to validate your signature. To agree on paper, Witness 1 must provide his or her signature on the “Signed” line in the “Witness 1” section, then report the signature “Date” next to the provided signature.  Once his or her signature has been supplied, Witness 1 must deliver the printed form of his or her name on the “Print Name” line.
 ![]() Finally, Witness 1 can complete his or her testimony with a record of his or her “Address” supplied to the final portion of the “Witness 1” section.
Finally, Witness 1 can complete his or her testimony with a record of his or her “Address” supplied to the final portion of the “Witness 1” section. ![]() Witness 2 must also verify your execution of this directive by signature. For this, Witness 2’s signature must be provided on the line labeled “Signed” under the “Witness 2” heading then document the current “Date” as that of his or her signature.
Witness 2 must also verify your execution of this directive by signature. For this, Witness 2’s signature must be provided on the line labeled “Signed” under the “Witness 2” heading then document the current “Date” as that of his or her signature. ![]() Next, the printed name of Witness 2 must be supplied to the “Print Name” line below the provided signature.
Next, the printed name of Witness 2 must be supplied to the “Print Name” line below the provided signature. ![]() Witness 2 must make use of the lines labeled “Address” to record the residential address he or she maintains.
Witness 2 must make use of the lines labeled “Address” to record the residential address he or she maintains. ![]()


